Showing posts with label Blooming Flourish. Show all posts

Friday, December 22, 2017

December Inspirations and VIDEO tutorial by Catherine Giguère

Hello BFS fans! It's been a year since I had the chance to be part of the Blue Fern Studios Creative Team. I had a blast. But now, it's time for me to say goodbye and thank you to Valerie and Leslie for this incredible opportunity. I have two last layouts and a video tutorial to share with you, I hope you will like it!

'Joy'


VIDEO TUTORIAL


I cut my paper Vintage Christmas Auld Lang Syne in two pieces and then I glued them on a 12 x12 chipboard. Then, I did a textured background with a stencil and modeling paste. I add brown ink and I stamped many details with brown ink again.


I embossed the Frame Collage and the Blooming Flourishes chipboards with Ginger embossing powder. I embossed my title with Forest powder.


Then, I add flowers and texture with Burgendy and Twig Seedlings.

Blue Fern Studios products used:

Papers
Vintage Christmas Auld Lang Syne
Vintage Christmas Greeting Cards

Chipboards
Frame Collage
Blooming Flourishes
Winter Titles
Vintage Christmas Printed Chipboards

Embossing Powder
Ginger
Forest

Seedlings
Burgendy
Twig

Stamps
Tattered Newsprint
Serendipity Medley

Flowers
Late Winter Lilies
Homespuns Blossoms

Lace
Lace 3

'Adorable'


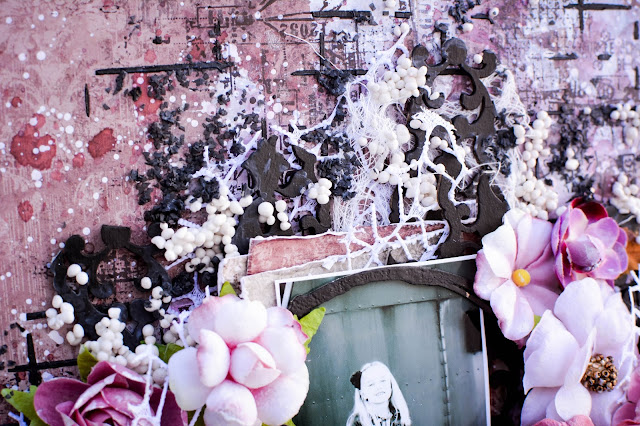
For this layout, I used the gorgeous Remnants collection. I did my layout on the Mayfair paper. I put a thin coat of white Gesso with a spatula on the half right side of my paper. I put purple inks on it. Then, I add details with stamps and black ink and texture with a stencil and black modeling paste. 


I painted with black Gesso all my chipboards. I cut in pieces the Damask Panel and put these under my flowers and my picture.


I add a lot of flowers and texture with Seedlings. I put a thin layer of white gesso on my flowers to give them a vintage look.


Blue Fern Studios products used:

Papers
Remnants Mayfair
Remnants Callaway

Chipboards
Damask Panel
Splattered Circles
French Words

Stamps
Making Plans
Departure
Grungy Grid

Flowers
Remnants Blooms

I hope you have found some inspiration. I wish you a nice crafty day!
Catherine Giguère 

Saturday, September 24, 2016

September Share by Karine

Hi,

I can't believe it's already the end of September! Were did the summer went? Oh my...

September 24th means it's my day here at Blue Fern Studios. So lets start with my first share.

A Walk on the Beach


You have probably seen this layout already, as I presented it September 1st for the moodboard reveal.

I started out with the Contemplation paper from the Serendipity collection.


All around my picture, I used some cards from the Calling Cards, along with some scrap pieces from the Fascination and Anticipation papers, also part of the Serendipity collection.


To add some interest to my background, I used the Brocade Texture and the Arcadia Textures stamps and embossed the patterns with snow Imagine Ink embossing powder. You can see some of the texture created on the picture above, over the flowers.


To embellish, I used some Seaside Lilies, Seaside Roses and Tranquil Roses and Lilies.

Lastly, my chipboard pieces, the Mesh Bits and my title (A Walk on the Beach) are covered with sandy paste and dry brushed with white gesso.


Glee


My second layout uses the Stillness paper from the Tranquility collection.


On my background, i used the Serendipity Medley and Essential Textures stamps.


I decided to cut apart the Dresden Corsage and to emboss the flowers I created with some Garnet Imagine Ink embossing powder. 


To go with the flowers, I also used the Spring Branch that I cut in pieces and embossed with Fern Imagine Ink embossing powder. To add some interest, I used a sponge to add some white gesso while the powder was still hot.


I used some flowers from the Attic Charm Daisies set and some from the Tranquil Blooms set.


Finally, my title piece is part of the Serendipity Words 2 set. I coloured it with ink.


Delightful


Finally, my last layout is called Delightful. I started with one of my all time favorites collection: Ombré Dreams. The background paper here is called Ginger's Dream.


I used the Forever and Serendipity Medley stamps to stamp on my background.


I cut the Turkish panel and embossed the pieces with Imagine Ink snow embossing powder.


Over that, I used the Blooming Flourish that I cut and embossed with Sea Mist Imagine Ink embossing powder. 


My title piece, part of The Optimist Word Set, is embossed with Auburn Imagine Ink embossing powder.

I hope it inspires you.
Have a nice day.


Monday, May 23, 2016

Tranquility inspiration by Pascale

Hello Sweeties

Today, I'm up on Blue Fern Studios blog with some new inspiration. In this first layout, I worked with a photo taken during a recent trip in  Ireland of the Kilmore Abbey (co. Galway, Ireland). 


I started to apply a thin layer of clear gesso to protect the paper, then I added a design with a stencil and 3D Gloss Gel. When dry, I added some colors to the background.


While the background was drying, I covered the Quatrefoil Panel with clear crackle paste and put it aside to dry too. Later I painted it grey..


I painted the Serenity chipboard with two shades of blue Twinkling H2Os, then I covered it with white gesso and finally I embossed it with the Pearl Imagine Ink embossing powder. The blue color show through the white layers.


I painted the Seaweed chipboards in green and added different colors of Imagine Ink embossing powder to add some texture. 


After I've glued all the embellishments, I finished the layout with eggplant glitters.

Blue Fern Studios products:
Papers - Tranquility (Peaceful, Calling Cards)
Chipboards - Quatrefoil Panel, Seaweeds and  Serenity, Calm, Hush
Flowers - Tranquil Roses and Lilies
Imagine Ink - Embosssing Powders (Mushroom, Sage, Ginger, Pearl)
Imagine Ink - Glitter (Eggplant)

----------------------------------------

For this second layout I chose another photo taken in Ireland of a lonely tree.


I'm sure that you certainly noticed that all the Blue Fern STudios's papers have an nice strip at the bottom of each page as can be seen below. Well, I kept all these small strips and I used them to create a texture base. 


I glued all the paper strips soft matte gel and covered them with a thin layer of black gesso. When dry, I splattered some white gesso that I've watered down.


While the background was drying, I covered the Mesh Bits with the Rust Paste.


I colored the leaves with a green Twinkling H2O and added randomly some Chili Powder and Verdant embossing powders. 


I covered the Blooming Flourishes and the title with white crackle paste and let dry naturally. Then I colored them with a Primary Element and amber Izink.


I added more splatter to the background with the Rust Paste and glue all the emellishments.

Blue Fern Studios products:

Papers : Tranquility (Serenity, Calling Cards)
Chipbords (Mesh Bits, Blooming Flourish and Serenity, Calm, Hushed)
Flowers (Tranquil Blooms)
Imagine Ink - Embossing Powders (Chili Powder, Verdant)
----------------------------------------

This third layout is based on May sketch. I took these photo of the town's belfry during a short visit of Avignon (France).


I started to stamp the background with the postmark collage of the "Journey" set, then I covered the paper with a thin layer of clear gesso.


When the background was drying, I die-cut some branches in a kraft paper that I stamped with the writing circle of the "Textures circles" set and embossed with the Ginger powder.


I colored the die-cut leaves and the "Seaweed" chipboard with green Distress inks and I embossed with several colors (Sage, Verdant, Nutmag and Muschroom).


I primed the "Swan Gate" with clear gesso before covering it with a clear crackle paste. When dry I painted it with a gray Primary Element.


When all the embellishments were in place, I added some colors with differents colors of Twinkling H2O. To finish, I added a design with the "Making Plans" stamp that embossed with the "Mushroom" powder.


Blue Fern Studios products:

Papers - Tranquility (Stillness), Serendipity (Calling Cards), Love Story (The Grand Ball)
Chipboards - Seaweeds, Swan Gate
Flowers - Courtship Blooms
Stamps - Textures Circles, Journay, Making Plan
Imagine Ink - Embossing Powders (Ginger, Nutmeg, Verdant, Sage, Mushroom).


Thursday, January 7, 2016

My first projects for Blue Fern Studios: Marie-Eve Bernard

Hello,

I'm so happy to present you my first three projects for Blue Fern Studios!  I'm so proud of being choose to be part of this great talented team.  I really hop to inspire you all year long.

My name is Marie-Eve Bernard.  I live in the beautiful Quebec City, Canada, with my family.  I'm the mother of two girls, Delphine and Mathilde, and pregnant of the third one (It's for July).  My husband, Laurent, will be surrounded by pink and princesses!  My family is my source of inspiration.  I'm a scrapbooker since more then 10 years now.  My style changed a lot over the past years.  I'm now passionate by mixed media.  I can't do a layout without getting my fingers dirty.  One thing that do not change over the years: my love of gorgeous papers, chipboards and flowers. So, I'm in heaven here with Blue Fern Studios products.


You can follow me there:


First Layout: Laughter

My first layout is made with the gorgeous Déjà Vu collection. I love the soft look of this collection.


On this flourish piece, I completely recovered it with the Iris Embossing Powder.  After, I emboss it a second time entirely with the Pearl Embossing Powder.  Finally, I add a little touch of Icicle Embossing powder.


The frame is simply embossed with the Icicle Embossing Powder.  For my title piece, I cover it with heavy Gesso and create texture with a stiff brush, just like stucco.  When the gesso is dry, I used a spray ink to color it.

Blue Fern Studios Products used:

Papers
- Déjà Vu Lustre (background paper)
- Déjà Vu Luminaries

Chipboards
- Laughter, Happy, Smile
- Blooming Flourish
- Ever After Frame Set

Imagine Ink Embossing Powder
- Pearl
- Iris
- Icicle

Stamps set:
-  Texture Circle

Second Layout:  Sweetheart

My second layout is ma with the brand new collection Blush!  This collection is simply gorgeous, girly and romantique.  It is completely my style and fall in love with it immediately.


On my background work, you can see that I use two Blue Fern Studios Stamp set (listed bellow).  On my Berry stems, I used Garnet Embossing Powder first and a little touch of the Otmeal one. My title is cut from the Valentine Cards paper. I use a tool to distress it on the edges.


Blue Fern Studios Products used:

Papers
- Blush Fondness  (background paper)
- Blush Valentine Cards
- Blush Celebration

Chipboards
- Berry Stems

Imagine Ink Embossing Powder
- Oatmeal
- Garnet

Stamps set:
-  Brocade Texture
- Vintage Edges


Third Layout:  Fairytale

My third layout is  made with the new Timeless Collection.  Such a wonderful collection too!  I was perfect for a picture of me in front of the Château de Chambord in France.  


I covered my frame with the Garnet Embossing Powder and ad touch of Mistic Plum.  I cut the corner flourish in two to have one on each side of my photo.  I use Mystic Plum Embossing Powder on the flourish pieces. For my title, I use the same technique from the first layout, but i apply two colours of spray ink.


Blue Fern Studios Products used:

Papers
- Timeless Maçonnerie (background paper)
- Timeless Freedom

Chipboards
- Story, Fairytale, Magic
- Corner Flourishes
- Ever After Frame Set

Imagine Ink Embossing Powder
- Garnet
- Mystic Plum

Stamps set:
- Texture Circles
- Vintage Edges

I hop you enjoy.
Thank you for passing by and see you next month!

Marie-Eve